So, I was deciding what title to choose for this post and the process went something like this:
How to hide pores with makeup – Nope, looks exaggerated
How I minimize enlarged pores on my face- nope, because I’m talking only about makeup here
How I minimize pores on my face with makeup – Yep, sounds correct! Ummm..no.. It can be better.
How to minimize pores on face with makeup– Final ! The only thing being I had written this as ” How to minimize pores on my face with makeup”
It’s only when I was about to hit the publish button that I realized my mistake. It’s not like I never have to edit my posts after publishing them but this title was too much (funny)! It felt like giving instructions to others on how to do my makeup while I sat on a chair with my name on it.
Moving past this awkward moment,
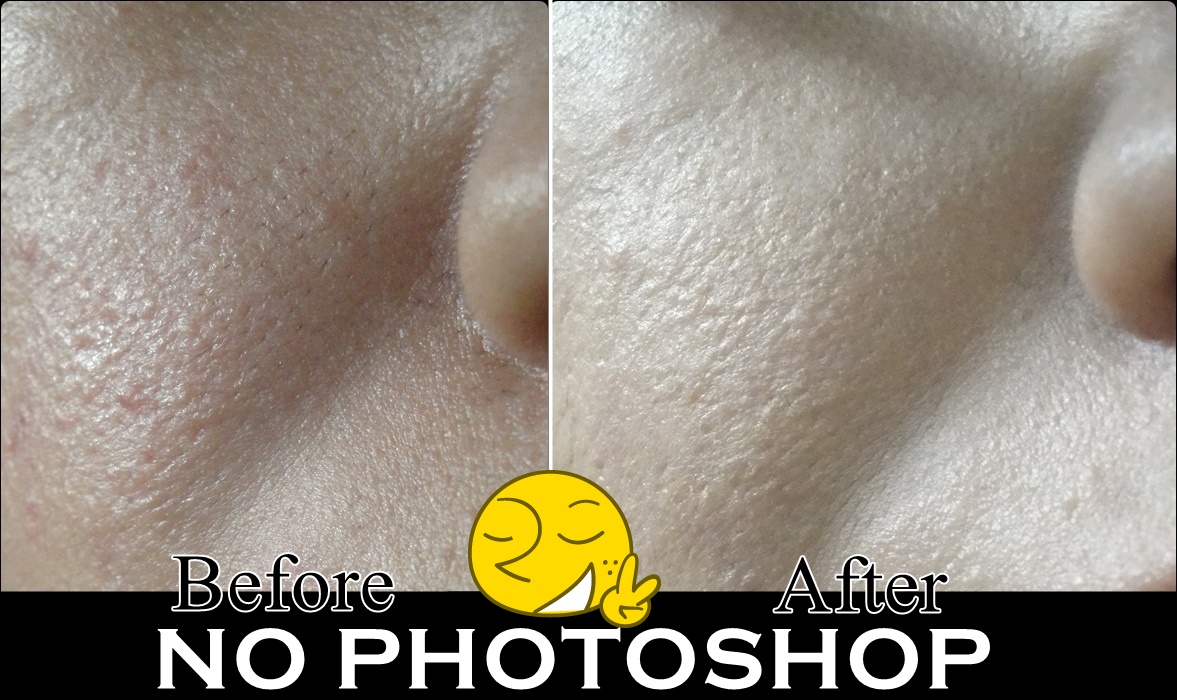
If you love makeup and have to constantly deal with big pores , you’ll know that the struggle is real. As soon as you apply foundation on your face, they look even more obvious. Apart from using the right products, it’s also important to be aware of some tricks that help in minimizing their appearance. If you’re wondering how to do that, this post should be helpful for you.

You only need one product for this tutorial:
A stippling brush or a buffing brush
I personally like to use a buffing brush. The main reasons being it takes lesser time and is easier to use around the nose area too.
Before I start with the tutorial, here’s a quick intro on what it is: A buffing brush has bristles packed densely together and is used to blend foundation to give a flawless finish. As compared to a stippling brush, it’s much easier (less technical) to use. Also, it consumes less product. I have used Real techniques buffing brush here. It’s available on Amazon in the core collection brush set.
Now, let’s get started with the tutorial:
1) Begin with exfoliating your face. Use the exfoliating liquid in small, circular motions to get rid of dead cells and prepare your skin for makeup application. Rinse and pat dry. This is a very important step, especially if you’ve dry skin or an oily skin with dry patches. My favourite is AHA glow face wash gel which is very gentle on my acne prone skin.
2) Follow up with a moisturizer. I either use a facial mist before it or mix 2 drops of water in it. This helps in better absorption. Let it sink in your skin before you apply foundation, like 2 mins.
3) Dot foundation on your skin. It’s best to start with less and build up the coverage in layers.
4) Using your buffing brush, make small circular motions on the area to push the foundation into your skin. Go with another layer and buff again to soften the imperfections.
You’ll be surprised to see the result! Don’t forget to set with powder. Please understand that the pictures I’ve put up are extremely close-up shots and that the modern camera captures more than what is visible to the bare eye.
Few things to note:
– This method will not cause your skin to breakout unless you’re sleeping with makeup on. That said, I can’t afford to do this every day on my very sensitive skin.
– Since the buffing action (circular motions with brush) causes a micro-exfoliating effect, you must prep your skin properly. Otherwise, you’ll be left with flaky skin.
– I tried this method on my friends who have a very dry skin and it did not work. It caused their skin to flake even more. So, let me know if you’ve a similar skin type and it works for you.
– The only reason why I have become less inclined towards this method is because of the dry patches on my cheeks.
– I’ve a lot of hair on my face and when I use this trick, I make sure to brush my hair downwards later. It helps.
Give this method a shot and let me know if you’ve any questions.